How to Render Beef Tallow: Complete Homesteading Guide
Walk into any kitchen before 1990, and you’d find something our grandparents considered essential but somehow disappeared from modern pantries: rendered animal fat. While various cooking oils have dominated grocery store shelves for decades, many homesteaders and traditional cooks are rediscovering one of humanity’s oldest and most versatile commodities, “Beef Tallow”.
If you’re serious about homesteading, preparedness, or simply reclaiming your food sovereignty, mastering the art of rendering tallow isn’t optional. It’s fundamental. This isn’t just about cooking fat, it’s about rediscovering a skill that kept our ancestors alive, healthy, and self-sufficient through winters, wars, and westward expansion.
What Is Tallow? Understanding This Forgotten Powerhouse
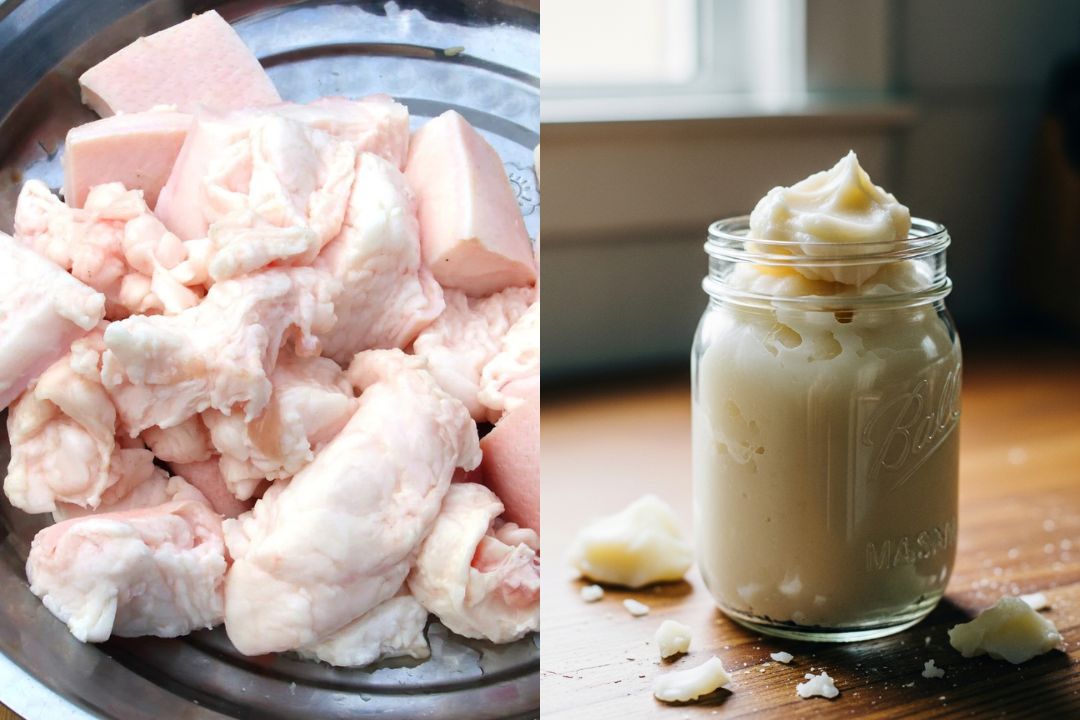
Tallow is the purified, rendered fat from ruminant animals primarily cattle, but also sheep, bison, or deer. The term “rendering” refers to the process of melting raw fat and separating the pure lipids from tissue, water, and impurities. What remains is a creamy white, shelf-stable fat that solidifies at room temperature and has been humanity’s multi-purpose tool for millennia.
The difference between tallow and other animal fats matters:
- Tallow: Rendered fat from ruminants (cattle, sheep, bison)
- Lard: Rendered fat from pigs
- Schmaltz: Rendered fat from poultry
Beef tallow specifically comes from “suet”, the hard, crumbly fat found around the kidneys and loins of cattle. This is the highest quality fat on the animal, containing minimal tissue and producing the cleanest, most stable rendered product.
Why Our Ancestors Depended on Tallow
From the Bronze Age through the early 20th century, tallow was indispensable. Ancient Romans used it for frying and lamp fuel. Medieval Europeans lit their homes with tallow candles when beeswax was too expensive. American pioneers crossing the plains carried tallow for cooking, leather treatment, and emergency medical care.
During westward expansion, rendered tallow often meant the difference between survival and starvation. It provided concentrated calories, protected leather goods from cracking in harsh weather, and could be bartered when currency was scarce. Frontier families rendered every ounce of fat from butchered animals, nothing was wasted.
Then came the 1990s. Health authorities vilified saturated fats, and fast-food chains like McDonald’s abandoned tallow in favor of “heart-healthy” vegetable oils. For three decades, this ancestral staple all but vanished. Now, as research reveals the dangers of industrial seed oils and the benefits of traditional fats, tallow is experiencing a renaissance among homesteaders, health-conscious cooks, and anyone seeking food independence.
Why Render Your Own Tallow? The Case for Self-Reliance
You can buy pre-rendered tallow online for $15-30 per pound. So why spend hours making it yourself?

Economic Freedom: Beef fat (suet) costs $1-2 per pound from local butchers, many will give it away free. A $7 investment yields 5-8 pounds of rendered tallow worth $75-150 retail.
Quality Control: You choose the source. Grass-fed, pasture-raised cattle produce tallow with a more favorable fatty acid profile and may contain modest amounts of fat-soluble vitamins. More importantly, you control every step of purification and know exactly what goes into your final product.
True Self-Sufficiency: If you raise livestock or hunt, rendering transforms waste into wealth. Every pound of fat becomes cooking oil, soap bars, candles, salves. complete independence from commercial supply chains.
Skill Sovereignty: Learning to render is learning to survive. When store shelves empty or budgets tighten, this ancestral knowledge becomes your hedge against uncertainty.
Speaking of food sovereignty, if you’re serious about building a complete homestead food stockpile that doesn’t depend on grocery stores or supply chains, you need to go beyond just rendering tallow. The comprehensive guide The Lost Superfoods contains 126 forgotten preservation techniques our grandparents used—including how to preserve half a pig for a year without refrigeration, make Depression-era survival foods, and create your own long-lasting emergency rations. It’s the perfect companion resource to the skills you’re learning here.”
The Remarkable Versatility of Tallow: 10+ Homestead Applications
Before we dive into the rendering process, understand what you’re creating. Tallow isn’t just cooking fat, it’s a Swiss Army knife for self-reliant living.
Kitchen Applications
High-Heat Cooking: With a smoke point of 420°F, tallow outperforms most vegetable oils. Perfect for deep-frying, searing steaks, or roasting vegetables. It creates the crispiest fried chicken and the flakiest pie crusts you’ve ever tasted.
Baking Excellence: Replace butter, shortening, or oil with tallow in any recipe. It produces tender biscuits, flaky pastries, and rich baked goods. Pioneer women baked exclusively with tallow for generations.
Reusable Frying Fat: Unlike seed oils that oxidize after one use, properly rendered tallow can be strained and reused multiple times without degradation.
Homestead & Survival Uses
Soap Making: Tallow-based soap has been the gold standard since ancient Rome. It produces hard, long-lasting bars with excellent lather—far superior to soft, quick-dissolving plant-oil soaps.
If you’re ready to take your homestead independence to the next level, learn how to make traditional lye soap from wood ash and animal fat, the perfect companion skill to rendering tallow.
Candle Production: Tallow candles burn clean and bright. While they lack the honey scent of beeswax, they cost a fraction and provide reliable emergency lighting.
Leather Conditioning: Pioneers waterproofed boots, saddles, and harnesses with tallow. It penetrates deep, prevents cracking, and repels moisture—crucial for gear longevity.
Wood Treatment: Use tallow to condition wooden tool handles, cutting boards, and bowls. It prevents splitting and creates a food-safe, water-resistant finish.
Rust Prevention: A thin tallow coating protects metal tools, knives, and cast iron from corrosion during storage.
Personal Care & Medicine
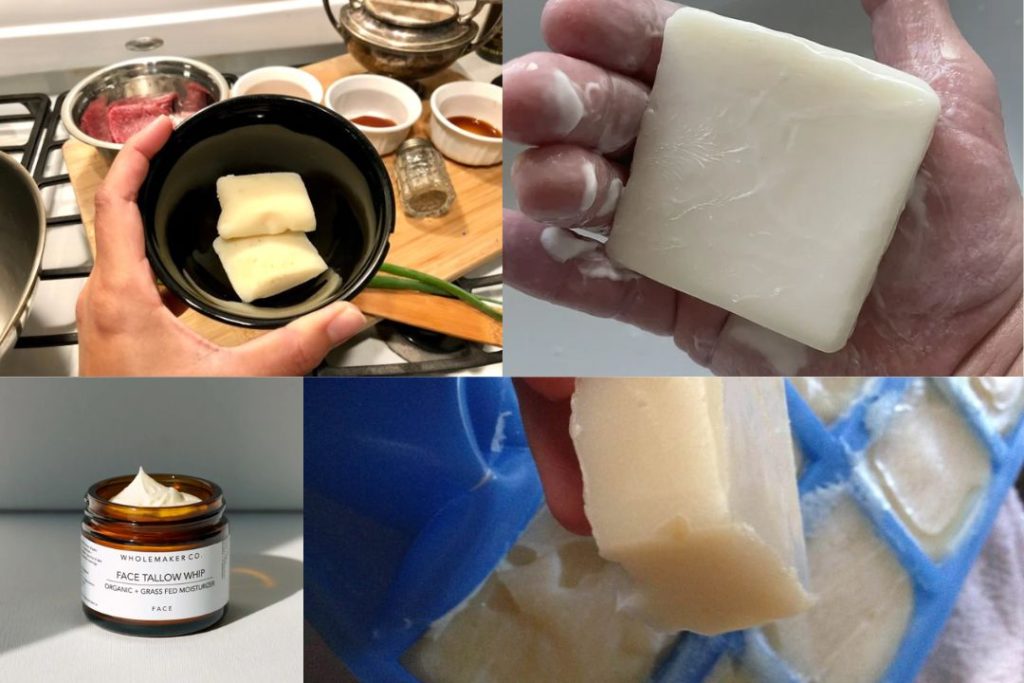
Skin Moisturizer: Tallow’s fatty acid profile closely mimics human sebum, making it exceptionally nourishing for skin. Historically used for chapped hands, windburn, and dry skin.
Salve Base: Mix tallow with herbs like calendula or comfrey for healing balms that treat cuts, scrapes, and minor burns.
Lip Balm: A simple blend of tallow and beeswax creates an effective, chemical-free lip treatment.
Mechanical Uses
Lubrication: Before petroleum products, tallow lubricated wagon wheels, door hinges, and machinery. It still works beautifully for wood-on-wood applications.
Waterproofing: Mixed with beeswax, tallow creates effective sealants for boots, canvas, and outdoor gear.
Sourcing Quality Beef Fat: Where to Find Suet
The quality of your tallow depends entirely on the quality of your starting material. Here’s what you need to know.
What to Ask For
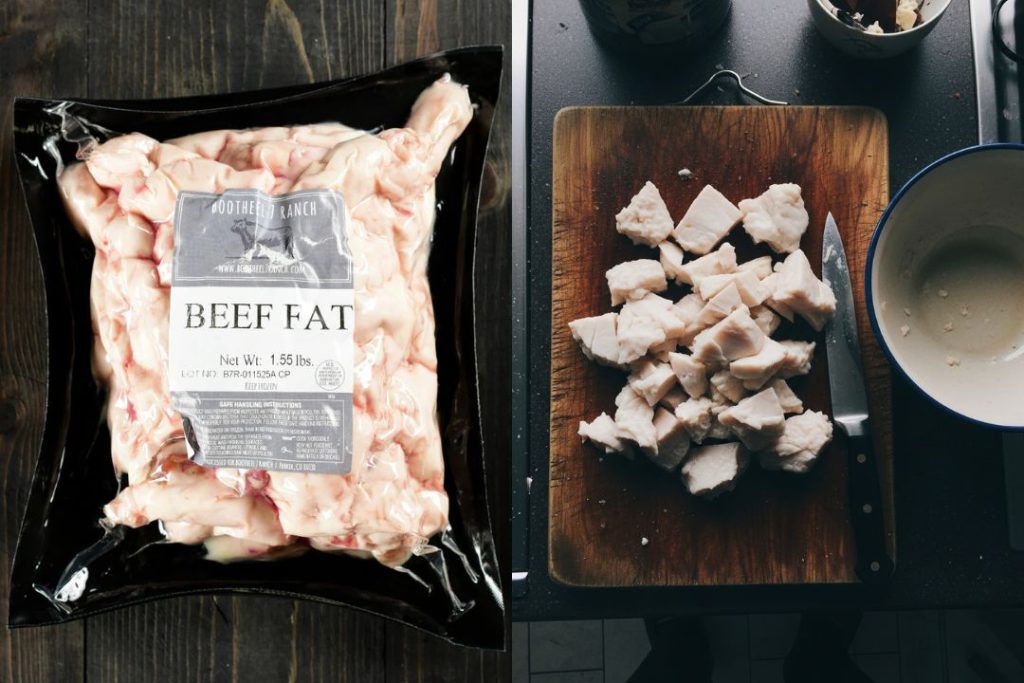
Request suet or kidney fat from your butcher. This is the hard, crumbly white fat surrounding the kidneys and along the loin. It’s the cleanest, highest-quality fat with minimal tissue or blood.
Avoid:
- Trim fat from meat cuts (contains more tissue and moisture)
- Fat with excessive blood or meat (creates darker, gamey tallow)
- Old or discolored fat (may already be rancid)
Where to Source
Local Butcher Shops: Call ahead and ask if they have beef fat available. Many butchers discard it or sell it cheap because demand is low. Expect to pay $1-2 per pound, or get it free if you buy regularly.
Farmers Markets: Build relationships with cattle farmers. They often have suet available, especially during butchering season (fall/winter).
Custom Meat Processors: If you’re processing your own livestock or split a cow with others, keep all the fat. A single steer yields 30-50 pounds of tallow.
Ethnic Grocery Stores: Some markets catering to traditional cooking cultures regularly stock beef fat.
Hunting Season: If you hunt deer, elk, or other ruminants, save the fat. Venison tallow works similarly to beef, though it may have a slightly gamier flavor. And while you’re preserving that fat, don’t forget the meat, learn how to make traditional pemmican to maximize every ounce of your harvest.
Quality Indicators
Grass-Fed vs. Grain-Fed: Grass-fed cattle produce tallow with better omega-3 to omega-6 ratios and higher levels of fat-soluble vitamins. The difference in cooking performance is negligible, but nutritional quality matters.
Color: Fresh suet is creamy white or very pale yellow. Avoid gray, brown, or yellow-tinged fat.
Texture: Quality suet is firm and crumbly, not soft or greasy.
Smell: Should have minimal odor. Strong or sour smells indicate spoilage.
Wet Rendering vs. Dry Rendering: Choosing Your Method
Two primary techniques exist for rendering tallow. Each has advantages depending on your priorities.
Wet Rendering (Salt Water Method)
This is the method detailed in our opening instructions, and it’s the preferred technique for homesteaders prioritizing purity, shelf stability, and minimal equipment monitoring.
How it works: Fat is melted slowly in water with salt. Impurities settle to the bottom or float to the top, making separation easy. Multiple purification cycles remove nearly all tissue, blood, and debris.
Advantages:
- Produces the cleanest, purest tallow
- Much less risk of burning or scorching
- Salt helps draw out impurities and moisture
- Easier to separate waste from finished product
- Better shelf life due to thorough purification
- More forgiving for beginners
Disadvantages:
- Takes longer (12+ hours per cycle)
- Requires multiple purification rounds
- Uses more water and salt
- Slightly more complex process
Best for: Tallow intended for long-term storage, skincare products, candles, or situations where absolute purity matters.
Dry Rendering
Fat is melted without any added liquid, either in an oven, stovetop, or slow cooker.
How it works: Cut fat is heated slowly until it liquefies. Cracklings (fried tissue bits) sink to the bottom, and liquid fat is strained off.
Advantages:
- Faster process (4-8 hours total)
- Simpler technique with fewer steps
- Cracklings are easier to use/eat
- No waiting for solidification between cycles
Disadvantages:
- Higher risk of scorching or burning
- Less thorough purification
- May retain slightly beefy flavor
- Requires closer monitoring
- Slightly shorter shelf life if not properly purified
Best for: Tallow primarily used for cooking where a subtle beef flavor is acceptable, or when speed matters more than maximum purity.
Equipment Note: Whether using wet or dry rendering, your specific slow cooker, pot, or oven will behave differently than others. First-time renderers should monitor closely and take notes on what works with their particular equipment. Adjust times and temperatures as needed based on your observations.”
The Complete Wet Rendering Process: Step-by-Step Mastery
This is the method that produces shelf-stable, odorless, pure white tallow suitable for any application. Budget 2-3 days for the full process, though active work time is minimal. Your first batch may take longer as you learn the rhythm, this is normal. Equipment variations and batch size will also affect timing.
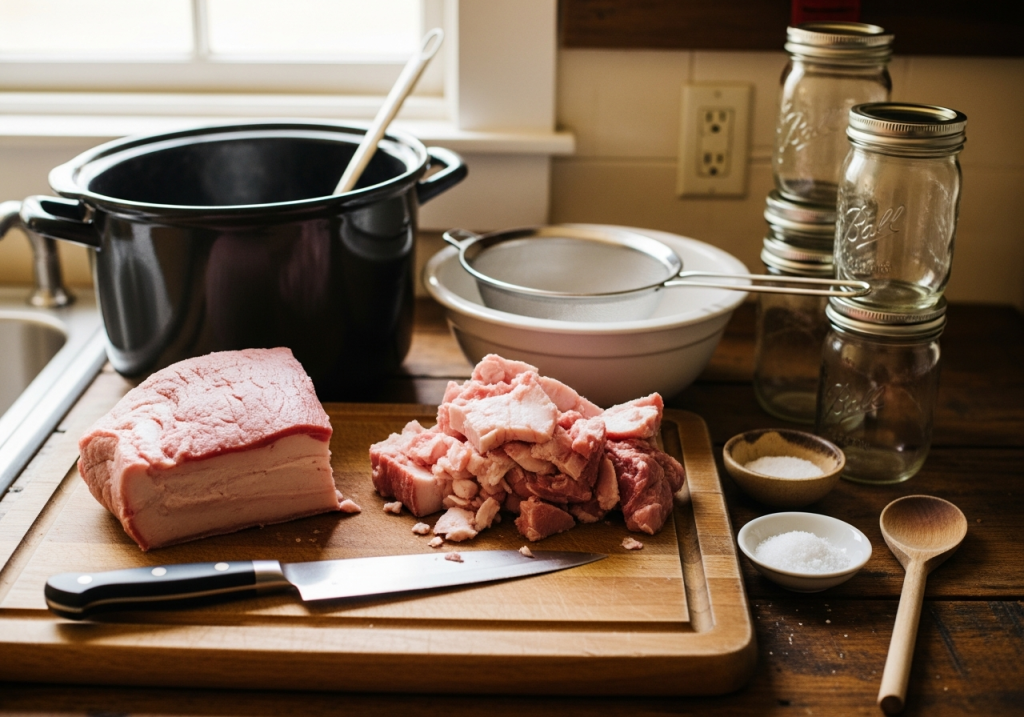
Equipment Needed
- Large slow cooker (6-quart minimum) or heavy stockpot
- Sharp knife and cutting board
- Cheesecloth or fine-mesh strainer
- Large bowl or container
- Glass jars for storage (Mason jars work perfectly)
- Spoon for stirring
- Refrigerator or cool space
Ingredients
- 5-10 pounds beef suet (the more you process, the more efficient)
- 2-4 tablespoons sea salt
- Water (enough to cover fat by 1-2 inches)
Phase 1: Preparation (30-45 minutes active time)
Step 1: Clean the Fat
Examine your suet carefully. Remove any obvious chunks of meat, blood clots, or dark tissue. Some tissue is inevitable, but remove what you easily can. Rinse the fat under cold water.
Pro tip: Partially freezing the fat (30-60 minutes in the freezer) makes it much easier to cut cleanly.
Step 2: Cut into Small Pieces
Using a sharp knife, cut the suet into ½-inch to 1-inch cubes. Smaller pieces render faster and more completely. This is the most labor-intensive step, but it’s crucial. Think of it as meditation—pioneers did this by firelight while sharing stories.
If you have a meat grinder, grinding the fat produces even faster, more complete rendering. This is ideal for large batches.
Why size matters: Surface area determines rendering speed. Small pieces expose more fat to heat, melting faster and more evenly.
Phase 2: First Rendering (12 hours low heat)
Step 3: Load the Slow Cooker
Place your cut fat in the slow cooker. Add salt (about 1 tablespoon per 2-3 pounds of fat). Pour in enough water to cover the fat by 1-2 inches.
The science of salt and water: Salt helps draw moisture and blood out of the fat tissues through osmosis. Water prevents scorching and allows impurities to settle separately from the melted fat, which floats on top.
Step 4: Set and Forget (Almost)
Set your slow cooker to LOW. You want gentle heat around 200-220°F. The fat should slowly melt without bubbling vigorously. If you notice any scorching smell or dark browning, your heat is too high, consider using a different setting or appliance.
Stir every 2-3 hours to ensure even heating and prevent sticking. Don’t skip this step, especially in the first few hours.
What you’ll observe:
- Hours 1-4: Fat begins softening and releasing liquid
- Hours 4-8: Most solid fat has melted; mixture looks soupy
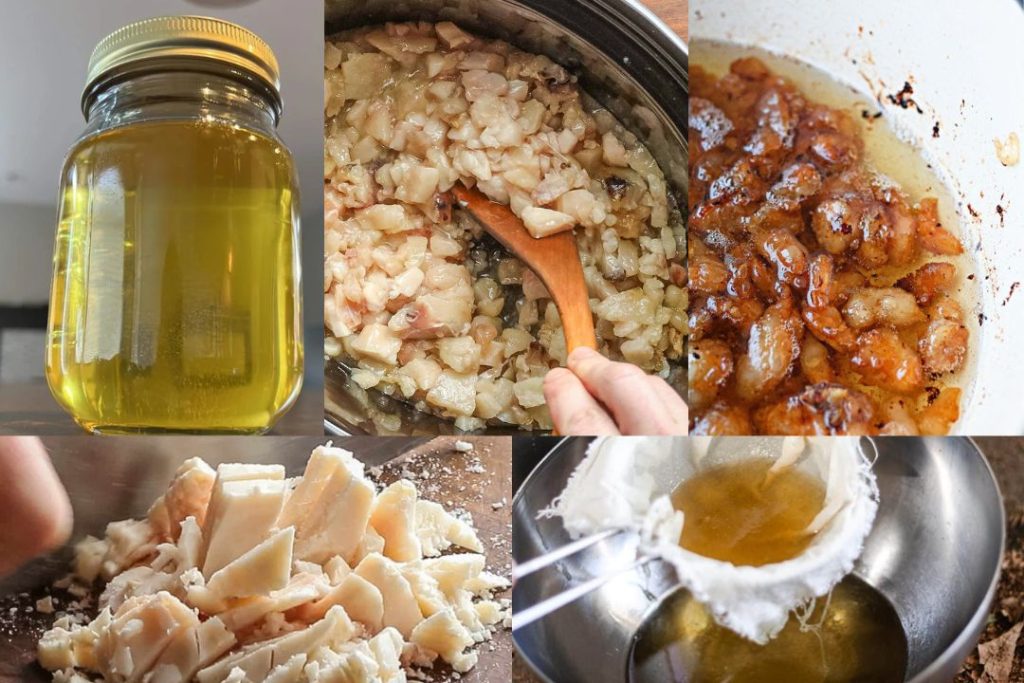
- Hours 8-12: Cracklings (fried tissue bits) have shrunk and browned; liquid is clear and golden
Step 5: Strain the Fat
After 12 hours, turn off the heat. Let the mixture cool for 15-20 minutes until safe to handle but still liquid.
Set up your straining station: Place cheesecloth in a fine-mesh strainer over a bowl. Pour or ladle the rendered fat through the cheesecloth.
Squeeze technique: Gather the cheesecloth containing cracklings and twist it to wring out every drop of liquid fat. This is where you maximize yield.
Don’t discard cracklings: These fried bits are edible and delicious—essentially beef rinds. Salt them and eat as a high-protein snack, or feed to chickens as a winter treat.
Phase 3: First Purification (4-6 hours)
Step 6: Refrigerate to Separate
Pour the strained liquid (it will be yellowish and possibly cloudy) into a wide, shallow container. Cover and refrigerate for 4-6 hours, or until completely solid.
What happens: As tallow cools and solidifies, the pure fat rises to the top as a hard white layer. Water, salt, and impurities sink to the bottom or remain trapped at the interface.
Step 7: Remove and Inspect
Once solid, remove the container from the refrigerator. You should see a solid white layer of tallow on top of a darker liquid layer.
Flip the container upside down onto a cutting board. The tallow block should pop out. If it doesn’t, run warm water on the bottom of the container briefly.
Examine the bottom of your tallow block, this is crucial. You’ll likely see brown, gray, or tan sediment, possibly some meat particles, and a layer of jellied water. This is exactly what we’re removing.
Step 8: Scrape Away Impurities
Using a butter knife or spoon, scrape all visible sediment, discoloration, and debris from the bottom of the tallow block. Be thorough. The cleaner you get it, the better your final product.
Inspection checkpoint: Your tallow should now be pale yellow to white on all sides. If you see dark spots, cut them away.
Phase 4: Second Rendering (2-3 hours)
Step 9: Re-render with Fresh Water
Place the cleaned tallow back in your slow cooker. Add fresh water and salt (1 tablespoon salt, water to cover). Heat on LOW for 2-3 hours until completely melted.
Why render again? This second cycle removes impurities trapped inside the fat that couldn’t be scraped away. Each rendering cycle purifies further.
Step 10: Strain and Refrigerate Again
Repeat steps 5-7: Strain through fresh cheesecloth, pour into a container, refrigerate until solid, flip out, and scrape the bottom.
Progress check: After the second rendering, your tallow should be notably whiter and cleaner. The bottom may still show some discoloration, but it should be minimal.
Phase 5: Third Rendering (2-3 hours)
Step 11: Final Purification Cycle
Yes, we render a third time. This is the difference between tallow that lasts 3 months and tallow that remains pristine for 2 years.
Repeat the process: Clean tallow + fresh water + salt → heat 2-3 hours → strain → refrigerate → scrape.
How many times? Keep rendering until the bottom of your tallow block shows no discoloration or sediment—just pure white fat. For most people, 3 cycles suffice. Perfectionists may do 4.
Texture transformation: By the third cycle, your tallow should have a crumbly, almost crystalline texture when solid. This indicates proper purification and excellent stability.
Phase 6: Final Rendering (1-2 hours)
Step 12: The Final Melt
This is the most satisfying step. Take your beautifully purified tallow and place it in a clean pot or slow cooker, no water, no salt this time. Just pure fat.
Heat gently until completely melted and warm enough to pour easily (not smoking or bubbling hard). This is simply melting, not rendering.
Temperature tip: Keep it around 180-200°F—just hot enough to stay liquid.
Step 13: Pour into Storage Containers
Have your clean, dry Mason jars ready. Pour the liquid tallow through a fine-mesh strainer (no cheesecloth needed this time) into jars.
Fill techniques:
- Leave ½ inch headspace at the top
- Pour slowly to avoid bubbles
- Wipe jar rims clean before sealing
As it cools: The tallow will solidify and turn a creamy white color. Don’t worry if it looks yellow while liquid—this is normal.
Phase 7: Storage
Let jars cool completely at room temperature (2-4 hours), then cap tightly.
Storage locations:
- Pantry/cupboard: Up to 12 months in a cool, dark, dry place
- Refrigerator: 18-24 months
- Freezer: 2+ years
- Note: Shelf life depends heavily on how thoroughly you purified the tallow and your storage conditions. Well-rendered tallow in optimal conditions can last longer; inadequately purified tallow or warm storage will shorten these timeframes.”
Critical storage rules:
- Keep away from heat, light, and moisture
- Use clean utensils every time you scoop
- Never introduce water into stored tallow
- Check periodically for signs of rancidity
Troubleshooting Common Rendering Problems
Even experienced homesteaders encounter issues. Here’s how to solve them.
Tallow Smells “Beefy” or Gamey
Cause: Insufficient purification; tissue and blood remain in the fat.
Solution: Do another rendering cycle with salt and water. Ensure you’re scraping thoroughly after each refrigeration.
Prevention: Start with the cleanest suet possible; trim aggressively.
Tallow Won’t Solidify Properly
Cause: Too much water remains in the fat, or temperature is too warm.
Solution: Heat the tallow again without water to evaporate moisture. Ensure storage area is cool (below 75°F).
Prevention: During final rendering, heat slightly longer to ensure all water has evaporated.
Tallow Tastes Burnt or Bitter
Cause: Overheating during rendering; fat scorched.
Solution: Unfortunately, burnt tallow can’t be fixed. Start over with new fat and lower heat.
Prevention: Never exceed 220°F during rendering. Use LOW heat exclusively. If using stovetop, use a heat diffuser.
Tallow Turns Yellow or Brown During Storage
Cause: Oxidation from exposure to light, heat, or air. Sign of early rancidity.
Solution: If caught early, re-render once more to remove oxidized portions. Use quickly.
Prevention: Store in dark place, seal tightly, minimize air exposure.
Sediment or Particles Visible in Stored Tallow
Cause: Inadequate straining during final pour.
Solution: Re-melt and strain through multiple layers of cheesecloth.
Prevention: Use fine-mesh strainer plus cheesecloth during final bottling.
Cracklings Won’t Release Fat When Squeezed
Cause: Rendering temperature too low; fat didn’t fully melt from tissue.
Solution: Put cracklings back in pot and heat longer at slightly higher temperature.
Prevention: Ensure rendering goes full 10-12 hours the first time; check that tissue pieces have shrunk and browned.
Identifying Rancidity: Know When to Discard
Rancid fat isn’t just unpleasant, it’s unhealthy. Learn to recognize the signs.
Smell: Fresh tallow should be nearly odorless or have a very faint, clean animal scent. Rancid tallow smells sour, like old crayons, paint, or stale oil.
Appearance: Fresh tallow is creamy white to pale yellow. Rancid tallow may develop brown or gray patches, especially around the edges.
Texture: Fresh tallow is firm and smooth. Rancid fat may become grainy, slimy, or develop a film on the surface.
Taste: If you’re uncertain, taste a tiny bit. Rancid tallow tastes bitter, soapy, or unpleasantly stale.
When in doubt, throw it out. Rancid fats contain harmful oxidized compounds. Your health isn’t worth the gamble.
Maximizing Shelf Life: Professional Storage Techniques
Proper storage transforms tallow from a seasonal product to a year-round staple.
The Enemy Quartet: What Destroys Tallow
- Heat: Accelerates oxidation; store below 75°F
- Light: UV rays break down fats; use opaque containers or dark storage
- Oxygen: Primary cause of rancidity; minimize air exposure
- Moisture: Promotes bacterial growth; keep bone-dry
Optimal Storage Containers
Mason jars: Excellent for pantry storage; use amber/dark glass if possible
Vacuum-sealed bags: Best for freezer storage; removes oxygen
Ceramic crocks: Traditional choice; keeps tallow cool and dark
Avoid: Clear plastic (allows light penetration), containers with loose lids
Extending Shelf Life
Purify thoroughly: The cleaner your tallow, the longer it lasts. Don’t skip rendering cycles.
Add antioxidants: A tiny amount of rosemary extract (natural antioxidant) can extend shelf life by months.
Portion control: Store in multiple small jars rather than one large container. Each time you open tallow, you introduce oxygen. Smaller portions mean less exposure.
Label everything: Include rendering date and fat source. Rotate stock—use oldest first.
Check regularly: Monthly inspection catches early rancidity before it spreads.
Why This Skill Matters More Than Ever
In an era of supply chain fragility, inflation, and growing awareness about food quality, rendering tallow represents tangible self-reliance.
You’re not just making cooking fat. You’re:
- Reclaiming ancestral knowledge that sustained humans for millennia
- Building skills that become valuable in uncertain times
- Creating products you’d otherwise purchase from corporations
- Connecting to food sources in a meaningful, respectful way
- Developing resilience that no government program or insurance policy can provide
- Discover more forgotten pioneer survival skills that could save your life today.
Our great-grandparents didn’t render tallow because it was trendy—they did it because survival demanded efficiency. Nothing was wasted. Every ounce of fat became food, light, medicine, or tool maintenance.
Modern homesteaders render tallow for the same reason: because they can. Because independence matters. Because knowing how to transform $7 of butcher scraps into a year’s supply of cooking fat, soap, and candles is power.
Getting Started: Your First Batch
Don’t overthink this. Start small.
Call three local butchers this week. Ask if they have beef fat or suet available. Pick up 3-5 pounds, enough to learn without being overwhelming.
Set aside a weekend. Follow the wet rendering method detailed above. Take notes. Observe what happens at each stage. Make mistakes; they’re part of mastery.
Your first batch won’t be perfect. It might smell slightly beefy. The color might not be pure white. That’s okay. Use it for cooking anyway. Learn what to improve.
By your third batch, you’ll understand the rhythm. By your fifth, you’ll have refined your technique. By your tenth, friends will ask where you buy your “expensive” tallow.
Final Thoughts: From Forgotten Fat to Essential Skill
Rendering tallow isn’t complicated. It’s just slow. It requires patience, attention to cleanliness, and willingness to work with animal products in ways modern culture finds unfamiliar.
But that’s precisely why it’s valuable. Easy skills are common. Uncommon skills the ones most people won’t learn, create resilience, independence, and capability.
Every jar of creamy white tallow cooling on your counter represents sovereignty. You made it. You control the quality. You decide how it’s used. No middleman, no marketing, no mystery ingredients.
When you cook breakfast potatoes in tallow you rendered from local beef, you’re not just making food. You’re practicing freedom.
Ready to Master More Lost Food Preservation Skills?
Rendering tallow is just the beginning of reclaiming food sovereignty. If this guide resonated with you, The Lost Superfoods takes you far deeper, with 126 forgotten preservation techniques, Depression-era recipes, and pioneer methods for stockpiling food that lasts years without electricity or modern conveniences. From making Doomsday Rations (37 cents per day) to preserving meat the way our ancestors did, it’s knowledge that’s becoming more valuable every day.